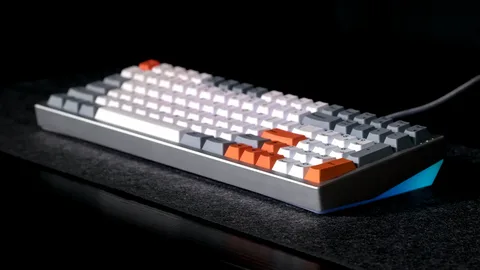
Mechanical keyboards have taken the tech and gaming world by storm, offering a personalized typing experience, aesthetic appeal, and superior durability. Among enthusiasts, small mechanical keyboards—especially 60% and 65% layouts—have gained immense popularity due to their compact form and sleek design. If you’re diving into building a custom small mechanical keyboard, there are several essential things you should know before you start.
Why Choose a Small Mechanical Keyboard?
Small mechanical keyboards typically lack the number pad, function row, and sometimes even arrow keys (depending on the layout). Despite this, they are favored for their portability, desk space efficiency, and minimalist appearance.
Advantages of a Custom Build
- Customization: Tailor every component—from switches and keycaps to the case and PCB.
- Performance: Choose switches that suit your typing or gaming style.
- Aesthetics: Match the keyboard with your desk setup or personal style.
Components You’ll Need
When building a custom small mechanical keyboard, understanding the key components is crucial. Here’s what you’ll need:
1. PCB (Printed Circuit Board)
The PCB is the heart of the keyboard. Choose one compatible with your desired layout (e.g., 60% or 65%). Hot-swappable PCBs allow for easier switch changes without soldering.
2. Case
The case holds all components together. Materials range from plastic to aluminum and acrylic, affecting both the feel and sound.
3. Switches
Mechanical switches come in different types—linear, tactile, and clicky. Your choice depends on whether you prefer a smooth keystroke, a tactile bump, or an audible click.
4. Keycaps
Keycaps vary in material (ABS or PBT), shape (profile), and legend style. This is where most of the visual customization happens.
5. Stabilizers
Stabilizers are used for larger keys like the spacebar and shift keys. Proper tuning of stabilizers improves typing feel and reduces rattle.
6. Plate
Plates support the switches and impact typing feel and acoustics. Materials include brass, aluminum, and polycarbonate.
Tools Required
To assemble your keyboard, you’ll need:
- A screwdriver
- Keycap puller and switch puller
- Soldering kit (if not using a hot-swap PCB)
- Switch lubing tools (optional but recommended)
Tips for First-Time Builders
Building a custom small mechanical keyboard: what you need to know extends beyond just the hardware. Consider these tips to make your build a success:
- Plan your layout: Decide whether you want arrow keys and additional function layers.
- Test components: Before full assembly, test the PCB with your switches to ensure all keys register.
- Take your time: A rushed build often leads to mistakes. Patience will yield a better result.
Final Thoughts
Building a custom small mechanical keyboard: what you need to know includes understanding the components, tools, and careful planning involved in the process. Whether you’re a gamer, programmer, or simply a mechanical keyboard enthusiast, the journey of creating a compact, functional, and aesthetically pleasing keyboard is both rewarding and fun.
Start small, research thoroughly, and enjoy the process of crafting your very own keyboard masterpiece.


